List category posts — Плагин для WordPress
List Category Posts allows you to list posts by category in a post or page using the [catlist] shortcode. When you’re editing a page or post, directly insert the shortcode in your text and the posts will be listed there. The basic usage would be something like this:
[catlist id=1]
[catlist name="news"]
The shortcode accepts a category name or id, the order in which you want the posts to display, and the number of posts to display. You can also display the post author, date, excerpt, custom field values, even the content! A lot of parameters have been added to customize what to display and how to show it. Check the full documentation to learn about the different ways to use it.
The [catlist] shortcode can be used as many times as needed with different arguments on each post/page.
[catlist id=1 numberposts=10]
There’s an options page with only one option -for the moment-, new options will be implemented on demand (as long as they make sense).
numberposts parameter, to define a default number of posts to show for each instance (you can override this value by using the numberposts parameter in your shortcode).Read the instructions to learn which parameters are available and how to use them.
If you want to List Categories instead of posts you can use my other plugin List categories.
You can find Frequently Asked Questions here.
Customization
The different elements to display can be styled with CSS. you can define an HTML tag to wrap the element with, and a CSS class for this tag. Check the documentation for usage. You can also check this nice tutorial which gives lots of tips and how-to’s to customize how to display the posts.
Great to use WordPress as a CMS, and create pages with several categories posts.
GUI
Klemens Starybrat has created a GUI for List Category Posts. It helps you create a shortcode from a nice visual interface in WordPress’ text editor. Check it out:
GUI for List Category Posts
AJAX pagination
The ajax pagination feature is maintained in an add-on plugin by Klemens Starybrat. Check it out:
Widget
Since WordPress 4.9, you can use shortcode in text widgets. So you can just add a text widget in Appearence > Widgets and write the List Category Posts shortcode.
The plugin also includes a widget as a simple interface for its functionality. Just add as many widgets as you want, and select all the available options from the Appearence > Widgets page. Not all the functionality in the shortcode has been implemented in the widget yet. You can use the shortcode for the most flexibility.
Please, read the information on the wiki and Changelog to be aware of new functionality, and improvements to the plugin.
Videos
Some users have made videos on how to use the plugin (thank you, you are awesome!), check them out here:
- Manage WordPress Content with List Category Posts Plugin
- WordPress: How to List Category Posts on a Page
Support the plugin
Klemens Starybrat has been writing lots of amazing code for this plugin, so if you’ve found it useful and want to pay it forward, consider sponsoring him on GitHub: https://github. com/sponsors/klemens-st
I have a PayPal account where you can donate too.
Development
Development is being tracked on GitHub. Fork it, code, make a pull request, suggest improvements, etc. over there. I dream of the day all of the WordPress plugins will be hosted on Git 🙂
Since the documentation on how to use the plugin has passed wordpress.org’s character limit, the text was cut. I’ve since started using a wiki for more comfortable reading and maintaining. Please check it out, suggestions are welcome on GitHub issues!
Instructions on how to use the plugin
Below you can find common shortcode use cases. You can use the shortcode while editing posts, pages, custom post types, text widgets and in all «page builder» plugins that support shortcodes.
Read the full documentation
- advanced post selection options (by date, search terms, custom fields, post types, custom taxonomies and more)
- output customizations (show each post’s date, author, excerpt, thumbnail and more)
- custom templates of your own design, based on a simple PHP example
List 10 latest posts:
[catlist]
The default number of listed posts is 10, to modify it you need to specify numberposts parameter:
[catlist numberposts=15]
List posts from the «Dogs» category:
[catlist name=Dogs]
List posts from the category with id 2:
[catlist id=2]
By default only the «post» post type is included. To list pages use:
[catlist post_type=page]
and for both posts and pages:
[catlist post_type="post,page"]
If we combine the above options we can get a shortcode that lists 15 items, including post and pages, from the «Dogs» category:
[catlist name=Dogs post_type="post,page" numberposts=15]
Most of the parameters you will find in the documentation can be used together.
The plugin can detect current post’s category and use it for listing:
[catlist categorypage=yes]
Same goes for tags:
[catlist currenttags=yes]
To show each post’s excerpt use:
[catlist excerpt=yes]
If you want to show the date, author and comments count next to each post, use:
[catlist date=yes author=yes comments=yes]
You can specify html tags and classes for many elements. Let’s modify the previous shortcode and wrap dates and authors in tags and classes of our choice:
[catlist date=yes date_tag=span date_class="my-date" author=yes author_tag=p author_class="my-author" comments=yes]
Read more about this feature
You can order posts by date:
[catlist orderby=date]
You can also use title, author, ID. More options are described in the documentation.
The plugin also supports pagination. You need to specify numberposts to tell the plugin how many posts per page you want:
[catlist pagination=yes numberposts=5]
See the wiki: Pagination for more information.
Please read the full documentation for detailed documentation of all plugin features, use cases and shortcode parameters.
List Category posts — Manual
List Category Posts allows you to list posts by category in a post or page using the
[catlist id=1]
[catlist name="news"]
The shortcode accepts a category name or id, the order in which you want the posts to display, and the number of posts to display. You can also display the post author, date, excerpt, custom field values, even the content! A lot of parameters have been added to customize what to display and how to show it. Check the full documentation to learn about the different ways to use it.
The [catlist] shortcode can be used as many times as needed with different arguments on each post/page.
[catlist id=1 numberposts=10]
There’s an options page with only one option -for the moment-, new options will be implemented on demand (as long as they make sense). Right now the only global option is the numberposts parameter, to define a default number of posts to show for each instance (you can override this value by using the numberposts parameter in your shortcode).
Read the instructions to learn which parameters are available and how to use them.
If you want to List Categories instead of posts you can use my other plugin
You can find Frequently Asked Questions here.
Customization
The different elements to display can be styled with CSS. you can define an HTML tag to wrap the element with, and a CSS class for this tag. Check the documentation for usage. You can also check this nice tutorial which gives lots of tips and how-to’s to customize how to display the posts.
Great to use WordPress as a CMS, and create pages with several categories posts.
Widget
Since WordPress 4.9, you can use shortcode in text widgets. So you can just add a text widget in Appearence > Widgets and write the List Category Posts shortcode.
The plugin also includes a widget as a simple interface for its functionality. Just add as many widgets as you want, and select all the available options from the Appearence > Widgets page. Not all the functionality in the shortcode has been implemented in the widget yet. You can use the shortcode for the most flexibility.
Please, read the information on the wiki and Changelog to be aware of new functionality, and improvements to the plugin.
Videos
Some users have made videos on how to use the plugin (thank you, you are awesome!), check them out here:
- Manage WordPress Content with List Category Posts Plugin
- WordPress: How to List Category Posts on a Page
Support the plugin
If you’ve found the plugin useful, consider making a donation via PayPal or visit my Amazon Wishlist for books or comic books :).
Development
Development is being tracked on GitHub. Fork it, code, make a pull request, suggest improvements, etc. over there. I dream of the day all of the WordPress plugins will be hosted on Git
Since the documentation on how to use the plugin has passed wordpress.org’s character limit, the text was cut. I’ve since started using a wiki for more comfortable reading and maintaining. Please check it out, suggestions are welcome on GitHub issues!
Instructions on how to use the plugin
SELECTING THE CATEGORY
The plugin can figure out the category from which you want to list posts in several ways. You should use only one of these methods since these are all mutually exclusive, weird results are expected when using more than one:
- Using the category id.
- id — To display posts from a category using the category’s id. Ex:
[catlist id=24].
- id — To display posts from a category using the category’s id. Ex:
- The category name or slug.

- name — To display posts from a category using the category’s name or slug. Ex:
[catlist name=mycategory]
- name — To display posts from a category using the category’s name or slug. Ex:
- Detecting the current post’s category. You can use the categorypage parameter to make it detect the category id of the current post, and list posts from that category.
- categorypage — Set it to «yes» if you want to list the posts from the current post’s category.
[catlist categorypage="yes"]
- categorypage — Set it to «yes» if you want to list the posts from the current post’s category.
When using List Category Posts whithout a category id, name or slug, it will post the latest posts from every category.
USING MORE THAN ONE CATEGORY
- Posts from several categories with an AND relationship, posts that belong to all of the listed categories (note this does not show posts from any children of these categories):
[catlist id=17+25+2]—[catlist name=sega+nintendo].
- Posts from several categories with an OR relationship, posts that belong to any of the listed categories:
[catlist id=17,24,32]—[catlist name=sega,nintendo]. - Exclude a category with the minus sign (-):
[catlist id=11,-32,16],[catlist id=1+2-3]. Important: When using the and relationship, you should write the categories you want to include first, and then the ones you want to exclude. So[catlist id=1+2-3]will work, but[catlist id=1+2-3+4]won’t.
Other ways of selecting what posts to show
child_categories — Exclude/include posts from the child categories. By default they are included. If you have a «Parent Category» and you use:
[catlist name="Parent Category"], you’ll see posts from it’s child categories as if they were posts from the same category. You can use this parameter to exclude these posts:[catlist name="Parent Category" child_categories=false].
author_posts — Get posts by author. Use ‘user_nicename’ (NOT
name). Example:[catlist author_posts="fernando"]tags — Tag support, display posts from a certain tag. You can use an «OR» relationship
[catlist tags="nintendo,sega"]or «AND» relationship (posts that belong to all of the listed tags):[catilst tags="nintendo+sega"].taxonomy — You can select posts using custom taxonomies. There’s two ways of selecting taxonomies:
- You need to set the taxonomy and the terms:
[catlist taxonomy='person' terms='bob']. It supports both the «IN» and «AND» logical relationships between each inner taxonomy. For theANDrelationship, separate terms with a plus sign:[catlist taxonomy='topic' terms='topic1+topic2']. For theORrelationship, separate terms with a comma:[catlist taxonomy='topic' terms='topic1,topic2'].
- Multiple taxonomies: You can use multiple taxonomy terms in one shortcode like this:
- OR —
taxonomies_or="tax1:{term1_1,term1_2};tax2:{term2_1,term2_2,term2_3}" - AND —
taxonomies_and="tax1:{term1_1,term1_2};tax2:{term2_1,term2_2,term2_3}"
- OR —
- You need to set the taxonomy and the terms:
currenttags — Display posts from the current post’s tags (won’t
work on pages since they have no tags). Pass it the ‘yes’ string for it to work:[catlist currenttags="yes"]exclude_tags — Exclude posts from one or more tags:
[catlist tags="videogames" exclude_tags="sega,sony"]starting_with — Get posts whose title starts with a certain
letter. Example:[catlist starting_with="l"]will list all posts
whose title starts with L. You can use several letters:[catlist starting_with="m,o,t"].monthnum and year — List posts from a certain year or month.
 You can use these together or independently. Example:
 [catlist year=2015]will list posts from the year 2015.[catlist monthnum=8]will list posts published in August of every year.[catlist year=2012 monthnum=12]will list posts from December 2012.date ranges — You can also use date ranges for listing posts. For example «list every post after March 14th, 2005». The parameters are:
after, after_year, after_month, after_day, before, before_year, before_month, before_day. These parameters are used to specify data_query arguments (see: the codex).If you want to list all the posts before a given date, say
Jun 17th, 2007you can use these two options:
[catlist before_year=2007 before_month=06 before_day=17]
Or you can use thebeforeparameter with a strtotime()-compatible string:
[catlist before=’2007/06/17′]The same works for posts after a given date, you can use:
[catlist after_year=2007 after_month=06 after_day=17]
Or justafterwith a strtotime()-compatible string:
[catlist after=’2007/06/17′]after takes priority over `after_year`, `after_month`, and `after_day`.
 before takes priority over `before_year`, `before_month`, and `before_day`.
search — List posts that match a search term.
[catlist search="The Cake is a lie"]excludeposts — IDs of posts to exclude from the list. Use ‘this’ to exclude the current post. Ex:
[catlist excludeposts=this,12,52,37]offset — You can displace or pass over one or more initial posts which would normally be collected by your query through the use of the offset parameter.
post_type — The type of post to show. Available options are: post — Default, page, attachment, any — all post types. You can use several types, example:
[catlist post_type="page,post" numberposts=-1]post_status — use post status, default value is ‘publish’. Valid values:
- publish — a published post or page.

- pending — post is pending review.
- draft — a post in draft status.
- auto-draft — a newly created post, with no content.
- future — a post to publish in the future.
- private — not visible to users who are not logged in.
- inherit — a revision. see get_children.
- trash — post is in trashbin (available with Version 2.9).
- any — retrieves any status except those from post types with ‘exclude_from_search’ set to true.
You can use several post statuses. Example:[catlist post_status="future, publish" excludeposts=this]
- publish — a published post or page.
show_protected — Show posts protected by password. By default
they are not displayed. Use:[catlist show_protected=yes]post_parent — Show only the children of the post with this ID.

Default: None.custom fields — To use custom fields, you must specify two values: customfield_name and customfield_value.
customfield_namedefines the name of the field, and you should choose the values for which you want posts to display. Using this only show posts that contain a custom field with this name and value. Both parameters must be defined, or neither will work. Eg:[catlist customfield_name="color" customfield_value="green"]will display posts with the valuegreenset on the custom fieldcolor. This parameter can be used together withcustomfield_orderby, see further below for more information.
PAGINATION
See the wiki: Pagination.
OTHER PARAMETERS
conditional_title — Display a custom title before the posts list.
The title is not displayed if the list is empty. Set to the empty string
(default value) to disable.
Example:[catlist conditional_title="Other posts"].conditional_title_tag — Specify the tag used for the conditional title.
Defaults to ‘h4’.conditional_title_class — Specify the class used for the conditional
title. Defaults to the empty string (no special class).orderby — To customize the order. Valid values are:
- author — Sort by the numeric author IDs.
- category — Sort by the numeric category IDs.
- content — Sort by content.
- date — Sort by creation date.
- ID — Sort by numeric post ID.
- menu_order — Sort by the menu order. Only useful with pages.
- mime_type — Sort by MIME type. Only useful with attachments.
- modified — Sort by last modified date.

- name — Sort by stub.
- parent — Sort by parent ID.
- password — Sort by password.
- rand — Randomly sort results.
- status — Sort by status.
- title — Sort by title.
- type — Sort by type. Ex:
[catlist name=mycategory orderby=date]
customfield_orderby — You can order the posts by a custom field. For example:
[catlist numberposts=-1 customfield_orderby=Mood order=desc]will list all the posts with a «Mood» custom field. This parameter can be used toghether withcustomfield_nameandcustomfield_value, you can use those parameters to select posts and thencustomfield_orderbyto sort by this or another custom field. Remember the default order is descending, more on order:order — How to sort orderby.
 Valid values are:
- ASC — Ascending (lowest to highest).
- DESC — Descending (highest to lowest). Ex:
[catlist name=mycategory orderby=title order=asc]
numberposts — Number of posts to return. Set to 0 to use the max
number of posts per page. Set to -1 to remove the limit.
Ex:[catlist name=mycategory numberposts=10]
You can set the default number of posts globally on the options
page on your Dashboard in Settings / List Category Posts.no_posts_text — Text to display when no posts are found. If you
don’t specify it, nothing will get displayed where the posts
should be.date — Display post’s date next to the title. Default is ‘no’,
use date=yes to activate it. You can set a css class and an html
tag to wrap the date in withdate_classanddate_tag(see HTML
& CSS Customization further below).
date_modified — Display the date a post was last modified next
to the title. You can set a css class and an html tag to wrap the
date in withdate_modified_classanddate_modified_tag(see
HTML & CSS Customization further below).author — Display the post’s author next to the title. Default is
‘no’, use author=yes to activate it. You can set a css class and an html
tag to wrap the author name in withauthor_classandauthor_tag(see HTML
& CSS Customization further below).When displaying the post author, you can also display a link to the
author’s page. The following parameter only works if author=yes
is present in the shortcode:- author_posts_link — Gets the URL of the author page for the
author. The HTML and CSS customization are the ones applied toauthor.
- author_posts_link — Gets the URL of the author page for the
dateformat — Format of the date output. The default format is the one you’ve set on your WordPress settings. Example:
[catlist id=42 dateformat="l F dS, Y"]would display the date as «Monday January 21st, 2013». Check https://codex.wordpress.org/Formatting_Date_and_Time for more options to display date.excerpt — Display a plain text excerpt of the post. Default is ‘no’, use
excerpt=yesorexcerpt=fullto activate it. If you have a separate excerpt in your post, this text will be used. If you don’t have an explicit excerpt in your post, the plugin will generate one from the content, striping its images, shortcodes and HTML tags. If you want to overwrite the post’s separate excerpt with an automatically generated one (may be useful to allow HTML tags), useexcerpt_overwrite=yes.If you use
excerpt=yes, the separate excerpt or content will be limited to the number of words set by the excerpt_size parameter (55 words by default).
If you use
excerpt=fullthe plugin will act more like WordPress. If the post has a separate excerpt, it will be used in full. Otherwise if the content has a <!—more—> tag then the excerpt will be the text before this tag, and if there is no <!—more—> tag then the result will be the same asexcerpt=yes.If you want the automatically generated excerpt to respect your theme’s allowed HTML tags, you should use
excerpt_strip=no, otherwise the HTML tags are automatically stripped.excerpt_size — Set the number of words to display from the excerpt. Default is 55. Eg:
excerpt_size=30excerpt_strip — Set it to
yesto strip the excerpt’s HTML tags. If the excerpt is auto generated by the plugin, the HTML tags will be stripped, and you should useexcerpt_strip=noto see the excerpt with HTML formatting.title_limit — Set the limit of characters for the title.
 Ex:
Ex:
[catlist id=2 title_limit=50] will show only the first 50
characters of the title and add «…» at the end.content — WARNING: If you want to show the content on your listed posts, you might want to do this from a new Page Template or a Custom Post Type template. Using this parameter is discouraged, you can have memory issues as well as infinite loop situations when you’re displaying a post that’s using List Category Posts. You have been warned. Usage:
yes— Show the excerpt or full content of the post. If there’s a <!—more—> tag in the post, then it will behave just as WordPress does: only show the content previous to the more tag. Default is ‘no’. Ex:[catlist content=yes]full— Show the full content of the post regardless of whether there is a <!—more—> tag in the post. Ex:[catlist content=full]
catlink — Show the title of the category with a link to the category.
 Use the catlink_string option to change the link text. Default is ‘no’. Ex:
 [catlist catlink=yes]. The way it’s programmed, it should only display the title for the first category you chose, and include the posts from all of the categories. I thought of this parameter mostly for using several shortcodes on one page or post, so that each group of posts would have the title of that group’s category. If you need to display several titles with posts, you should use one [catlist] shortcode for each category you want to display.category_description Show the category description wrapped in a p tag:
[catlist id=1 category_description='yes']catname — Show the title of the category (or categories), works exactly as
catlink, but it doesn’t add a link to the category.category_count — Shows the posts count in that category, only works when using the catlink option:
[catlist name=nintendo catlink=yes category_count=yes]comments — Show comments count for each post.
 Default is ‘no’. Ex:
 [catlist comments=yes].thumbnail — Show post thumbnail (http://markjaquith.wordpress.com/2009/12/23/new-in-wordpress-2-9-post-thumbnail-images/). Default is ‘no’. Ex:
[catlist thumbnail=yes].force_thumbnail — If the previous parameter is set to ‘yes’, and there’s no featured image, setting this to ‘yes’ or ‘true’ will make the plugin look for the first image in the post and use it as a thumbnail. Ex:
[catlist thumbnail=yes force_thumbnail=yes].thumbnail_size — Either a string keyword (thumbnail, medium, large or full) or 2 values representing width and height in pixels. Ex:
[catlist thumbnail_size=32,32]or[catlist thumbnail_size=thumbnail]thumbnail_class — Set a CSS class for the thumbnail.
post_suffix — Pass a String to this parameter to display this
String after every post title.
Ex:[catlist numberposts=-1will create something like:
post_suffix="Hello World"]<ul id=lcp_instance_0> <li> <a href="http://127.0.0.1:8080/wordpress/?p=42" title="WordPress"> WordPress </a> Hello World </li>display_id — Set it to yes to show the Post’s ID next to the post title:
[catlist id=3 display_id=yes]class — CSS class for the default UL generated by the plugin.
tags_as_class — Use a post’s tags as a class for the
lithat lists the posts. Default isno. For example,[catlist tags_as_class=yes]will show a post that has thefuntag like this:<li>
<a href="http://localhost:8080/?p=1267" title="Post Title">Post Title</a>
</li>customfield_display — Display custom field(s).
 You can specify
many fields to show, separating them with a coma. If you want to
display just the value and not the name of the custom field, use
customfield_display_name and set it to no.
By default, the custom fields will show inside a div with a
specific class:<div>. You can customize
this using the customfield_tag and customfield_class parameters to
set a different tag (instead of the div) and a specific class
(instead of lcp-customfield).customfield_display_glue — Specify the text to appear between two custom
fields if displayed together, defaults to the empty string. Not used if
thecustomfield_display_separatelyparameter is defined.customfield_display_separately — Display the custom fields separately.
Each custom field is displayd within its own tag (seecustomfield_tag).
Defaults to ‘no’, set to ‘yes’ to enable. Superseeds the
customfield_display_glue parameter when enabled.customfield_display_name — To use with
customfield_display.
Use it to just print the value of the Custom field and not the
name. Example:
[catlist numberposts=-1 customfield_display=»Mood»
customfield_display_name=»no»]
Will print the value of the Custom Field «Mood» but not the text
«Mood: [value]».customfield_display_name_glue — To use with
customfield_display_name.
Use it to specify the text between the name and the value, defaults to
‘ : ‘.template — By default, posts will be listed in an unordered list
(ul tag) with the class ‘lcp_catlist’:<ul><li><a href="https://wordpress.org/plugins/list-category-posts/post1">Post 1</a></li>...
You can use a different class by using the class parameter.

You can create your own template file (Check Template System
further down this document) and pass it as a parameter here. The
parameter is the template name without the extension. For example
formytemplate.php, the value would bemytemplate.You can also pass these two parameters which yield different
results:div— This will output a div with thelcp_catlistclass
(or one you pass as a parameter with theclassargument). The
posts will be displayed between p tags.[catlist template=div]ol— This will output an ordered list with thelcp_catlist
css class (or the one you pass as a parameter with theclass
argument) and each post will be a list item inside the ordered list.[catlist template=ol].
morelink — Include a «more» link to access the category archive for the category.
 The link is inserted after listing the posts. It receives a string of characters as a parameter which will be used as the text of the link. Example:
 [catlist id=38 morelink="Read more"]posts_morelink — Include a «read more» link after each post. It receives a string of characters as a parameter which will be used as the text of the link. Example:
[catlist id=38 posts_morelink="Read more about this post"]link_target — Select the
targetattribute for links to posts (target=_blank, _self, _parent, _top, *framename*). Example:[catlink id=3 link_target=_blank]will create:<a href="http://localhost/wordpress/?p=45" title="Test post" target="_blank">Test post</a>no_post_titles — If set to
yes, no post titles will be shown. This may make sense together withcontent=yes.link_titles — Option to display titles without links.
 If set to
 false, the post titles won’t be linking to the article.link_dates — Option to wrap dates with a link to the post. Set to
trueoryesto enable, set tofalseornoto disable. Defaults tofalse.
Опубликована: 06.02.2018
Оценка: (0)
Опубликовано
Список сообщений категории — Плагин WordPress
Список сообщений категории позволяет вам перечислять сообщения по категориям в сообщении или на странице, используя шорткод [catlist] . Когда вы редактируете страницу или сообщение, вставьте шорткод прямо в текст, и сообщения будут перечислены там. Базовое использование будет выглядеть примерно так:
 [идентификатор_каталога=1]
[имя_каталога="новости"]
Шорткод принимает имя или идентификатор категории, порядок отображения сообщений и количество отображаемых сообщений. Вы также можете отобразить автора сообщения, дату, выдержку, значения настраиваемых полей и даже содержимое! Было добавлено множество параметров для настройки того, что отображать и как это отображать. Ознакомьтесь с полной документацией, чтобы узнать о различных способах его использования.
Шорткод [catlist] можно использовать столько раз, сколько необходимо, с разными аргументами для каждой записи/страницы.
[catlist id=1 numberposts=10]
На странице опций только одна опция — на данный момент — новые опции будут реализованы по запросу (если они имеют смысл). Прямо сейчас единственным глобальным параметром является параметр numberposts , чтобы определить количество сообщений по умолчанию для отображения для каждого экземпляра (вы можете переопределить это значение, используя numberposts 9).0004 в вашем шорткоде).
Прочтите инструкции , чтобы узнать, какие параметры доступны и как их использовать.
Если вы хотите Список категорий вместо постов, вы можете использовать мой другой плагин Список категорий .
Вы можете найти часто задаваемых вопросов здесь.
Персонализация
Различные отображаемые элементы могут быть оформлены с помощью CSS. вы можете определить HTML-тег для переноса элемента и класс CSS для этого тега. Проверьте документацию по использованию. Вы также можете проверить этот хороший учебник, который дает множество советов и инструкций по настройке отображения сообщений.
Отлично подходит для использования WordPress в качестве CMS и создания страниц с сообщениями нескольких категорий.
Графический интерфейс пользователя
Клеменс Старибрат создал графический интерфейс для сообщений категории списка. Это поможет вам создать шорткод из приятного визуального интерфейса в текстовом редакторе WordPress. Проверьте это:
GUI для сообщений категорий списка
Разбиение на страницы AJAX
Функция разбиения на страницы ajax поддерживается в надстройке плагина от Klemens Starybrat. Проверьте это:
LCP Ajax Pagination
Виджет
Начиная с WordPress 4.9, вы можете использовать шорткод в текстовых виджетах. Таким образом, вы можете просто добавить текстовый виджет в «Внешний вид»> «Виджеты» и написать шорткод списка сообщений категории.
Плагин также включает в себя виджет в качестве простого интерфейса для своей функциональности. Просто добавьте столько виджетов, сколько хотите, и выберите все доступные параметры на странице Внешний вид > Виджеты. Не весь функционал шорткода реализован в виджете. Вы можете использовать шорткод для максимальной гибкости.
Пожалуйста, ознакомьтесь с информацией на вики и журнале изменений, чтобы быть в курсе новых функций и улучшений плагина.
Видео
Некоторые пользователи сняли видео о том, как использовать плагин (спасибо, вы великолепны!), посмотрите их здесь:
- Управление содержимым WordPress с помощью плагина List Category Posts
- WordPress: как составить список сообщений категории на странице
Поддержите плагин
Клеменс Старибрат написал много замечательного кода для этого плагина, поэтому, если вы нашли его полезным и хотите заплатить вперед, подумайте о том, чтобы спонсировать его на GitHub: https://github. com /спонсоры/ул. Клеменса
У меня есть счет PayPal, на который вы тоже можете делать пожертвования.
Разработка
Разработка отслеживается на GitHub. Делайте форки, кодируйте, делайте пулреквесты, предлагайте улучшения и т.д. Я мечтаю о том дне, когда все плагины WordPress будут размещены на Git 🙂
Поскольку документация по использованию плагина превысила лимит символов на wordpress.org, текст был сокращен. С тех пор я начал использовать вики для более удобного чтения и поддержки. Пожалуйста, ознакомьтесь с ним, предложения по вопросам GitHub приветствуются!
Инструкции по использованию плагина
Ниже вы можете найти распространенные варианты использования шорткода. Вы можете использовать шорткод при редактировании постов, страниц, пользовательских типов постов, текстовых виджетов и во всех плагинах «конструктора страниц», которые поддерживают шорткоды.
Прочтите полную документацию , чтобы узнать о многих других функциях, включая:
- расширенные параметры выбора сообщений (по дате, условиям поиска, настраиваемым полям, типам сообщений, настраиваемым таксономиям и т.
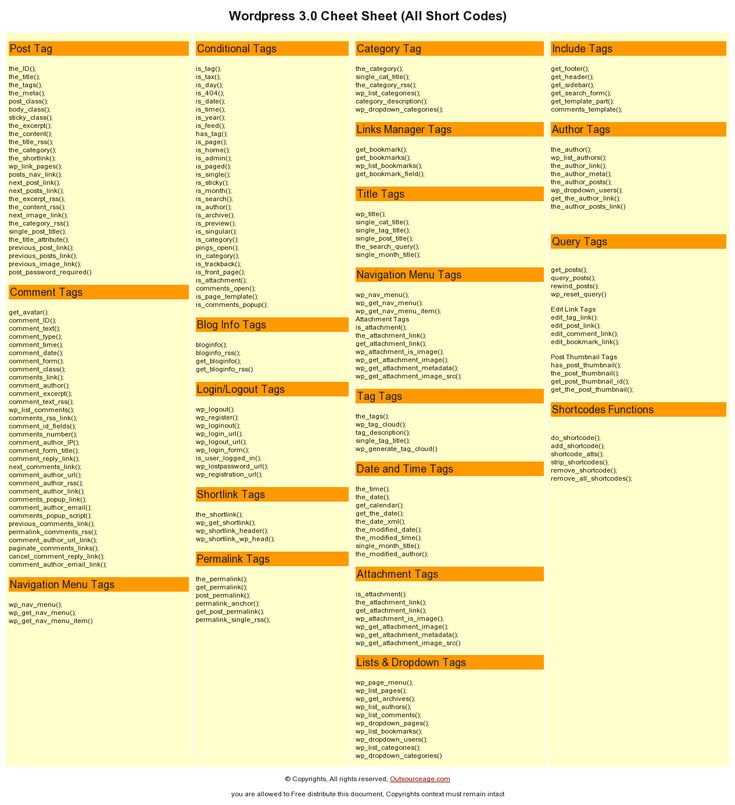 д.)
д.) - настройки вывода (показывать дату каждого сообщения, автора, отрывок, миниатюру и т. д.)
- пользовательских шаблона вашего собственного дизайна, основанного на простом примере PHP
Список 10 последних сообщений:
[каталог]
По умолчанию количество сообщений в списке 10, для его изменения необходимо указать параметр numberposts :
[catlist numberposts=15]
Список сообщений из категории «Собаки»:
[имя_каталога=Собаки]
Список постов из категории с id 2 :
[catlist id=2]
По умолчанию включен только тип записи «post». Для списка страниц используйте:
[catlist post_type=page]
, а также для постов и страниц:
[catlist post_type="post,page"]
Если мы объединим вышеуказанные параметры, мы можем получить шорткод, в котором перечислены 15 элементов, включая сообщения и страницы, из категории «Собаки»:
[catlist name=Dogs post_type="post,page" numberposts=15]
Большинство параметров, которые вы найдете в документации, можно использовать вместе.
Плагин может определить категорию текущего сообщения и использовать ее для листинга:
[catlist categorypage=yes]
То же самое касается тегов:
[список текущих тегов = да]
Чтобы показать отрывок из каждого поста, используйте:
[выдержка из каталога = да]
Если вы хотите отображать дату, автора и количество комментариев рядом с каждым сообщением, используйте:
[catlist date=yes author=yes comments=yes]
Вы можете указать HTML-теги и классы для многих элементов. Давайте изменим предыдущий шорткод и обернем даты и авторов в теги и классы по нашему выбору:
[catlist date=yes date_tag=span date_class="my-date" author=yes author_tag=p author_class="my-author" comments= да]
Подробнее об этой функции
Вы можете упорядочивать сообщения по дате:
[каталожный список orderby=дата]
Вы также можете использовать заголовок , автор , ID . Дополнительные параметры описаны в документации.
Плагин также поддерживает нумерацию страниц. Вам нужно указать numberposts , чтобы сообщить плагину, сколько сообщений на странице вы хотите:
[catlist pagination=yes numberposts=5]
См. вики: Разбиение на страницы для получения дополнительной информации.
Пожалуйста, прочитайте полную документацию для получения подробной документации по всем функциям плагина, вариантам использования и параметрам шорткода.
Как настроить WordPress для отображения сообщений категории с помощью шорткодов
- Фейсбук
- Твиттер
Веб-сайты становятся все больше и больше, что делает такие функции сортировки, как таксономии, более полезными, чем когда-либо. Если вы хотите, чтобы посетители могли легко находить релевантный контент, разместите записи категорий, чтобы они могли найти похожие темы.
Хорошей новостью является то, что это очень легко сделать, используя несколько простых шорткодов. Это означает, что вы можете добавить список категорий в любое место публикации, страницы или даже виджета. Он надежный и простой в использовании.
Сегодня я покажу, как это сделать с помощью плагина List Category Posts.
Зачем перечислять записи категорий в WordPress?
Цель каждого веб-сайта — удерживать своих посетителей как можно дольше. Однако, когда посетитель заканчивает читать сообщение, он, как правило, покидает сайт.
Список сообщений категории — отличный способ направить посетителя к другому сообщению в той же категории. Это позволяет отображать похожий контент в этом сообщении или на странице. Многие популярные блоги и новостные агентства будут отображать похожие сообщения внизу статьи.
Это гарантирует, что если посетитель закончит читать текущий пост, он будет перенаправлен на новый. Если все пойдет правильно, они останутся на вашем сайте и прочитают другую статью. Это просто на практике, но очень эффективно.
Тот же подход работает с продуктами в магазинах. Например, если вы просматриваете продукт на Amazon, вы обычно видите похожие продукты, которые можете просматривать. Таким образом, это очень эффективная техника, независимо от типа вашего сайта.
И, как вы сейчас увидите, это действительно легко реализовать в WordPress.
Как составить список сообщений категории в WordPress
Шаг 1: Установите список сообщений категории
Плагин списка сообщений категории — это простой инструмент, который добавляет пользовательский шорткод на ваш сайт. Шорткод можно добавить к любому сообщению, странице или виджету в WordPress, и единственное изменение, которое вам нужно сделать, — это отображаемую категорию.
Конечно, в то время как предпосылка плагина проста, есть много возможностей для настройки. Вы можете добавить пользовательский CSS, чтобы изменить внешний вид того, что отображает шорткод. Для получения дополнительной информации посетите страницу плагина.
Начнем с установки плагина.
Нажмите «Плагины» и выберите «Добавить новый» на левой панели администратора.
Найдите Сообщения категории списка в доступном окне поиска. Это подтянет дополнительные плагины, которые могут оказаться полезными.
Прокрутите вниз, пока не найдете плагин List Category Posts, нажмите кнопку «Установить сейчас» и активируйте плагин для использования.
Шаг 2: Настройте параметры
Теперь вы можете начать добавлять шорткоды сразу после активации плагина, но перед этим я рекомендую заглянуть на страницу настроек плагина. В этом нет ничего особенного, но он дает вам большой контроль над тем, что вы показываете посетителям.
На левой панели администратора нажмите «Настройки» и выберите параметр «Список сообщений категории».
Здесь вы найдете четыре параметра, которые вы можете настроить. Вверху вы можете выбрать, сколько сообщений будет отображаться при использовании шорткода. Это очень важно, потому что отображение большого количества постов занимает много места.
По умолчанию установлено значение 10, но вы можете изменить его на любое другое значение, которое вам больше подходит.
Ниже вы найдете варианты нумерации страниц и порядок появления сообщений. Опять же, просто выберите лучшие варианты для вашего сайта.
Важно отметить, что все эти настройки могут быть включены в шорткод. Однако это может затруднить использование новичками. По этой причине использование страницы настроек является лучшим вариантом для большинства.
Нажмите кнопку «Сохранить изменения», когда будете готовы продолжить.
Шаг 3: Список сообщений вашей категории
Вы готовы начать использовать плагин. Напоминаем, что плагин ориентирован на шорткоды. Их можно настроить в соответствии с вашими потребностями, а все варианты можно найти в документации плагина.
В этом руководстве основное внимание уделяется основам, чтобы сделать его максимально простым. Итак, давайте начнем с основного шорткода:
.
[список кошек]
Этот шорткод будет отображать последние сообщения на вашем сайте независимо от категории. Количество отображаемых сообщений определяется настройками, которые вы выбрали на предыдущем шаге (значение по умолчанию — 10).
Теперь наша цель — отображать сообщения из определенной категории, поэтому нам нужно изменить шорткод. Таким образом, шорткод, который мы хотим использовать, будет:
[имя_каталога=Собаки]
Этот шорткод будет отображать последние сообщения, найденные в категории «Собаки». Вы можете изменить «Собаки» на любую категорию на вашем веб-сайте, и это будут сообщения, которые будут отображаться.
Теперь, когда мы знаем, на что способен плагин, осталось только его использовать. Перейдите к любому сообщению, странице или виджету, где вы хотите отобразить список сообщений категории. Оказавшись там, вставьте приведенный выше шорткод с категорией, которую вы хотите отобразить.
Сохраните изменения и вы сможете просмотреть список на своем сайте.
С помощью шорткодов можно делать гораздо больше, но это действительно охватывает основы плагина.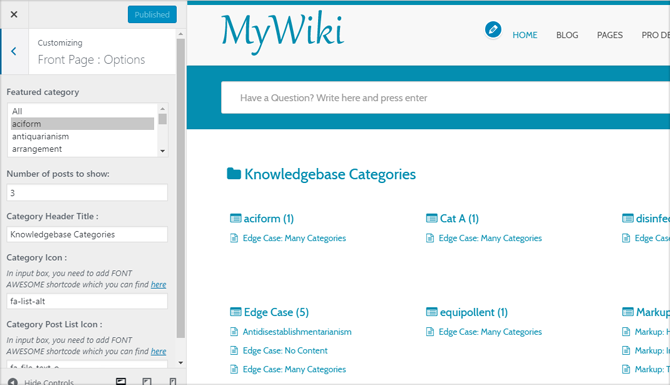 Как вы можете видеть в приведенном выше примере, он будет просто перечислять сообщения по заголовку. Поэтому постарайтесь сделать так, чтобы они были интересны.
Поздравляем, вы научились использовать плагин List Category Posts в WordPress!
Не ограничивайте себя категориями, попробуйте эти идеи
Плагин, который я использовал для этого урока, полон всевозможных параметров настройки. От базовых ссылок на контент до более сложных функций вы можете настроить страницу для определенных типов контента, чтобы упростить просмотр для посетителей.
Вот лишь несколько идей, которые могут вас заинтересовать:
Создание внутренних ссылок
Использование этого шорткода для отображения дополнительного контента помогает сайту создавать внутренние ссылки. Посетители могут легче найти больше контента, который имеет отношение к текущей теме. Это особенно полезно, если вы отображаете сообщения в соответствии с тегами и определенными категориями.
Поскольку код по умолчанию извлекает самые последние фрагменты, эти ссылки всегда будут актуальными.
Демонстрация гордости авторов
По мере роста веб-сайтов очень часто увеличивается число присутствующих авторов. Это гарантирует, что вы сможете получить больше контента, и иногда читатели предпочитают одного автора другому. Вы можете воспользоваться этим, используя шорткод для отображения сообщений определенного автора.
Это отличный способ извлечь выгоду из контента популярного автора, но это применимо не к каждому сайту.
Более быстрый способ отображения контента
Если вы настроите шорткод с вашими специфическими настройками, например, используя «цифровые сообщения» или «миниатюру = да», они могут стать довольно длинными. Вместо того, чтобы вводить их каждый раз, почему бы не сохранить их как шаблон в файле Блокнота или каком-либо другом плагине для создания заметок для WordPress?
Это позволяет легко найти шорткод, который вы хотите использовать, без необходимости запоминать строку символов. Просто скопируйте и вставьте его в свой пост, страницу или боковую панель.
