Lightbox & Modal Popup WordPress Plugin — FooBox — Плагин для WordPress
- Детали
- Отзывы
- Установка
- Поддержка
- Разработка
FooBox was the first lightbox to take responsive layout seriously. Not only does it scale images to look better on phones, but it rearranges it’s button controls to look great in both portrait or landscape orientation.
Add a modal popup to your website images with no setup. FooBox will automatically add modals to WordPress galleries, WordPress images with captions, and attachment images.
Works with most image gallery plugins, but works best with our FooGallery Gallery WordPress Plugin.
FULL GUTENBERG SUPPORT
Within Gutenberg, FooBox lightbox will automatically add a modal popup to images and galleries that have the «Link To» setting set to «Media File».
Image captions set in the editor are also automatically picked up in the FooBox modal popup.
FooBox Image Lightbox Features:
- Responsive lightbox design
- Modern lightbox design
- Zero configuration!
- Works with WordPress galleries
- Works with WordPress captioned images
- Control when to exclude / include FooBox JS & CSS assets
Includes a 7-day free trial of FooBox Pro Lightbox!
You can try the PRO version for free for 7 days.
FooBox PRO Features:
- Social sharing (10+ networks)
- Video lightbox support
- HTML lightbox support
- iFrame support
- Внешняя [гипер] ссылка
- Fullscreen and slideshow modes
- Metro lightbox style
- Flat lightbox style
- 5 color schemes, 12 buttons icons and 11 loader icons
- 85+ settings to customize
FooBox PRO Works With:
- The Best Image Gallery Plugin for WordPress
- NextGen
- Justified Image Grid
- Envira Gallery
- WooCommerce product images (Works with WooCommerce v3+)
- JetPack Tiled Gallery
- AutOptimize
Check out the full feature comparison.
Complete FooBox Asset Control
By default, FooBox lightbox includes javascript and stylesheet assets into all your pages. We do this, because we do not know if the page content contains media or not.
Alternatively, you can leave the setting disabled, and then choose to exclude the FooBox assets from particular pages. A new metabox is now available when editing your pages or posts.
This new feature was only available in the PRO version beforehand, but we feel control over your website performance is something you should not have to pay for. Enjoy!
Translations
- Serbo-Croatian by Borisa Djuraskovic
- Frontend example
- Phone example
- Upload
foobox-freefolder to the/wp-content/plugins/directory - Активируйте плагин используя меню ‘Плагины’ в WordPress
- A modal lightbox will automatically be added to your linked images and galleries
FooBox is not working.
 I do not see a lightbox
Make sure your images/galleries are set to Link To the Media File (within Gutenberg).
In the class editor, make sure your images/galleries are linking to the media file.
FooBox scans for images or thumbs that are pointing to the full-size version of the image. If the image is not linking to the full size image, then FooBox cannot work on that image.FooBox is not working. There is an error in the console «Uncaught ReferenceError: FooBox is not defined»
Some plugins or themes defer javascript in the page, which causes the FooBox initialization code to run BEFORE the FooBox main script is loaded. This has been fixed in version 1.2.24. Please upgrade.
My theme has a built-in lightbox and it shows under FooBox. What can I do?
There is a setting to try and disable hard coded lightboxes, but this is not a sure-fire solution for every scenario.
 If that setting does not work for you, you might need to deregister certain javascript files, or uncomment certain lines of code in your theme to remove it’s lightbox.
The best working plugin!
Good free version
In addition to being an attractive and user friendly lightbox, FooBox Image Lightbox allowed me to provide a convenient image download link for visitors to my genealogy website!
Im Grunde ist es genau das Plugin um eine schöne Galerie zu erstellen. Mehrere Optionen auch in der Grundversion. Aber… das Problem ist die Foobox. Denn die lädt jedes Bild zweimal wenn es angeklickt wird und legt das zweite Bild unter das zuerst angeklickte. Dann noch so ein Phänomen, anfangs als alles noch funktionierte, da waren die Bilder auch mit den Cursortasten zu bewegen. Geht auch nicht mehr.
Also, wie geschrieben eigentlich ein tolles Addon, aber durch die Foobox völlig unbrauchbar.
Basically it’s just the plugin to create a beautiful gallery.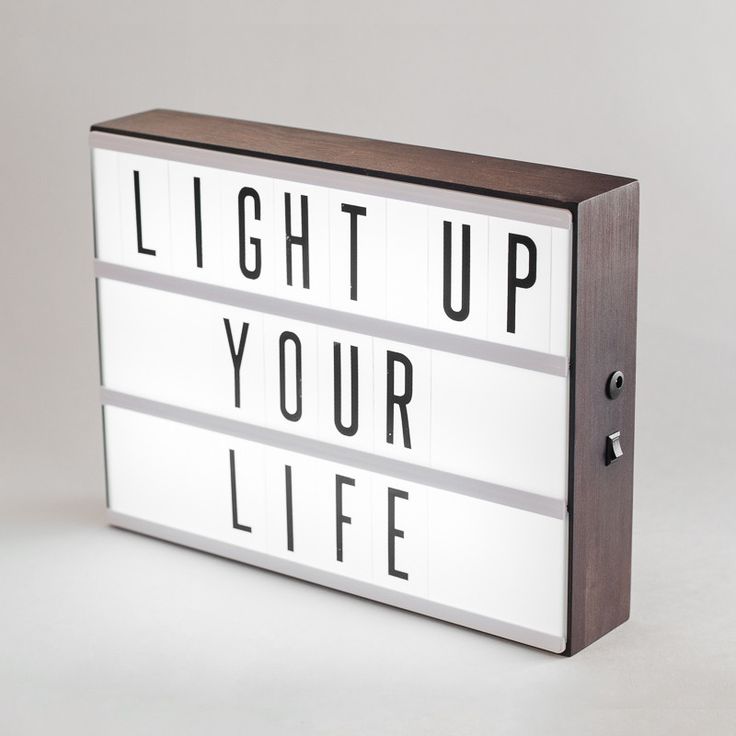
I am really happy to have found this plugin and the support I received. I had to upgrade to the Premium version, though, to be able to use it for iFrames. And the detours it takes to make it work change the Media entries original purposes, and nullify a couple features (title becomes a link, Alt doesn’t do anything, hover cannot display linked icons, although I was able to use alt code substitutes). But all in all, I’m very satisfied! I could not have figured this out on my own, but the support was excellent so, kudos to the team! Andre
Good, good, good.
Посмотреть все 79 отзывов
«Lightbox & Modal Popup WordPress Plugin — FooBox» — проект с открытым исходным кодом. В развитие плагина внесли свой вклад следующие участники:
Участники
- bradvin
- fooplugins
«Lightbox & Modal Popup WordPress Plugin — FooBox» переведён на 13 языков. Благодарим переводчиков за их работу.
Перевести «Lightbox & Modal Popup WordPress Plugin — FooBox» на ваш язык.
Заинтересованы в разработке?
Посмотрите код, проверьте SVN репозиторий, или подпишитесь на журнал разработки по RSS.
Мета
- Версия: 2.7.17
- Обновление: 5 месяцев назад
- Активных установок: 100 000+
- Версия WordPress: 3.5.1 или выше
- Совместим вплоть до: 6.
 0.3
0.3 - Языки:
Dutch, Dutch (Belgium), English (Canada), English (US), French (France), Galician, German, Persian, Russian, Spanish (Colombia), Spanish (Ecuador), Spanish (Mexico), Spanish (Spain) и Spanish (Venezuela).
Перевести на ваш язык
- Метки:
galleryimageslightboxmodalpopup
- Дополнительно
Оценки
Посмотреть все
- 5 звёзд 50
- 4 звезды 4
- 3 звезды 3
- 2 звезды 5
- 1 звезда 17
Войдите, чтобы оставить отзыв.
Участники
- bradvin
- fooplugins
Поддержка
Решено проблем за последние 2 месяца:
4 из 5
Перейти в форум поддержки
Пожертвование
Would you like to support the advancement of this plugin?
Пожертвовать на развитие плагина
Gallery Lightbox — Плагин для WordPress
- Детали
- Отзывы
- Установка
- Поддержка
- Разработка
WordPress supports image galleries without having to use any plugins.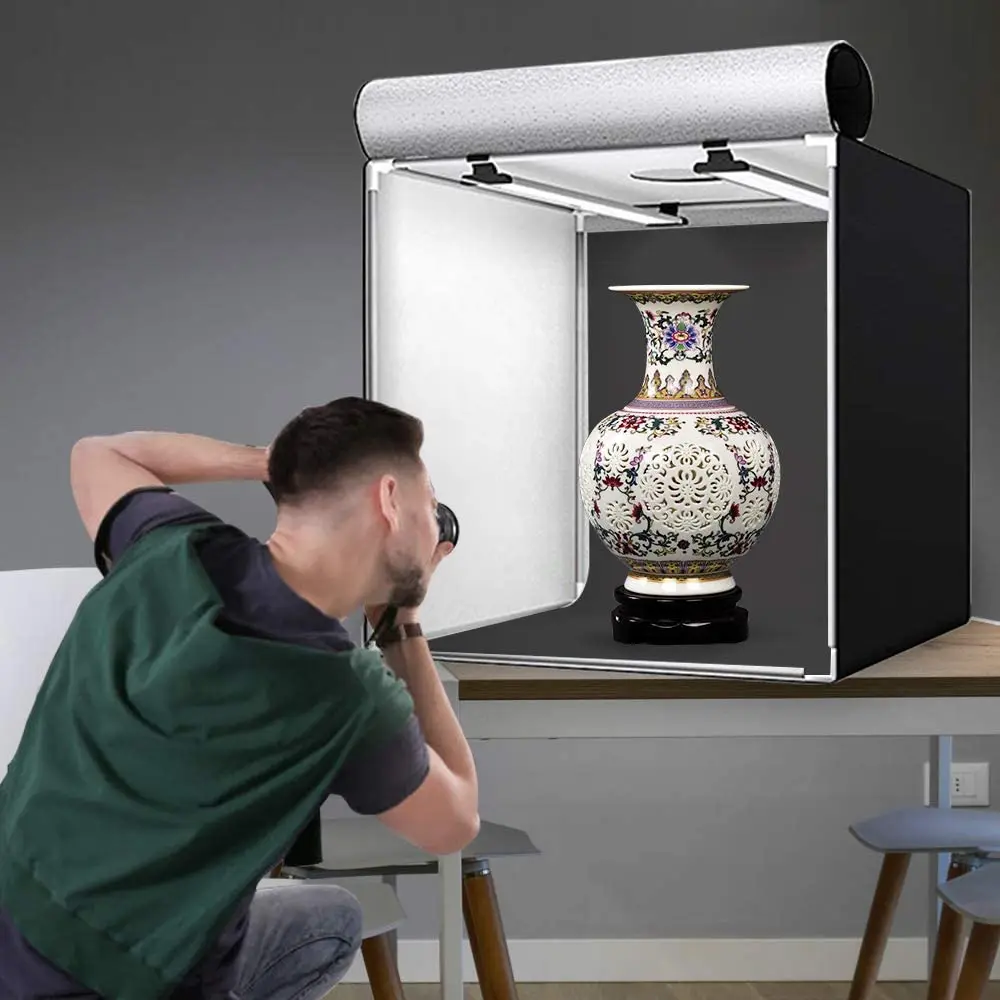
We also provide the best image carousel plugin that will allow you to make your default WordPress gallery into awesome image carousel. Just download Image Carousel Plugin, install, sit back and enjoy 🙂
With free version you will get the following gallery feature :
- Extends the default Gallery options
- Automatically add lightbox to WordPress image galleries
- Set Slideshow Auto Play
- Change Slideshow Interval
- Show / hide Bottom Thumbnails
- Change Slider Overlay Color
- Ability to display gallery as Carousel, just install Image Carousel Plugin
- and more free feature will available every release new version
Demo with Gallery Block
Demo with Classic Editor
Рекомендуемые плагины
The following are other recommended plugins by the author:
- Best Gallery Plugin — Easy Media Gallery is a wordpress plugin designed to display various media support including grid gallery, galleries, photo album, multiple photo albums, portfolio, photo gallery or image gallery.
- Best Contact Form — The Best Contact Form Plugin to create awesome Contact Form in minutes.

- Best Image Slider Plugin — Easy Image Slider Widget — Displaying your image as slider in widget/sidebar area with very easy. Allows you to customize it to looking exactly what you want.
- Best Popup Plugin — The Best Notify and Subscription Form Plugin to display notify popup, announcement and subscribe form with very ease, fancy and elegant.
- Best Image Carousel — Touch enabled WordPress plugin that lets you create a beautiful responsive image carousel.
Перевод
- Deutsch / Deutschland
- Espanol / Espana
- Francais / France
- Italy
- шведский
- Bahasa Indonesia
- Hebrew
- Malaysia
- Polish
NOTEIf you would like to create your own language pack or update the existing one, you can send the text of PO and MO files for GhozyLab and we’ll add it to the plugin. You can download the latest version of the program for work with PO and MO files Poedit.

Техническая поддержка
If any problem occurs or if you think, that you found a bug please contact us at [email protected].
Gallery Lightbox step by step guide
There are no complicated instructions for using Gallery Lightbox plugin because this Lightbox plugin designed to make all easy. Please watch the following video and we believe that you will easily to understand it just in minutes :
- On Frontend
- On Backend
For automatic installation:
The simplest way to install is to click on ‘Plugins’ then ‘Add’ and type ‘Gallery Lightbox’ in the search field.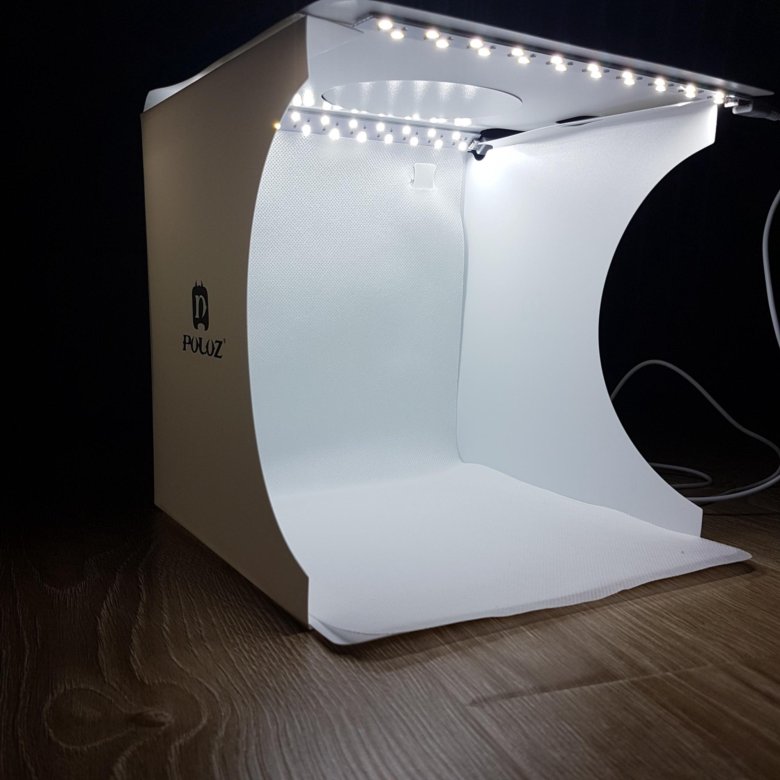
For manual installation 1:
- Login to your website and go to the Plugins section of your admin panel.
- Click the Add New button.
- Under Install Plugins, click the Upload link.
- Select the plugin zip file (gallery-lightbox-slider.x.x.x.zip) from your computer then click the Install Now button.
- You should see a message stating that the plugin was installed successfully.
- Click the Activate Plugin link.
For manual installation 2:
- You should have access to the server where WordPress is installed. If you don’t, see your system administrator.
- Copy the plugin zip file (gallery-lightbox-slider.zip) up to your server and unzip it somewhere on the file system.
- Copy the «gallery-lightbox-slider» folder into the /wp-content/plugins directory of your WordPress installation.
- Login to your website and go to the Plugins section of your admin panel.
- Look for «Gallery Lightbox» and click Activate.
How to use Gallery Lightbox Plugin?
There are no complicated instructions for using Gallery Lightbox plugin because this Lightbox plugin designed to make all easy. Please watch the following video and we believe that you will easily to understand it just in minutes :
How can I get support?
- We are not able to provide anything other than community based support for Gallery Lightbox Plugin.

- We are not able to provide anything other than community based support for Gallery Lightbox Plugin.
How can I say thanks?
- Just recommend our plugin to your friends! or
- If you really love Gallery Lightbox Plugin any donation would be appreciated! It helps to continue the development and support of the plugin.
But seriously, I just want to drink coffee for free, so help a developer out. You can use this link Donate to Gallery Lightbox.
It does what it is supposed to do without having to configure anything, perfect!
Simply made galleries with exemplary good effects.
I like that it is simple and straightforward, unfortunately after some tests this is not what I needed. It would have been better if lightbox is disabled for images that linked to other pages (not media file nor attachment page). The current state of the plugin would override internal links on images. Disabling it for all galleries in a particular page would not work for me either, there is a mix of images with and without links on the same page.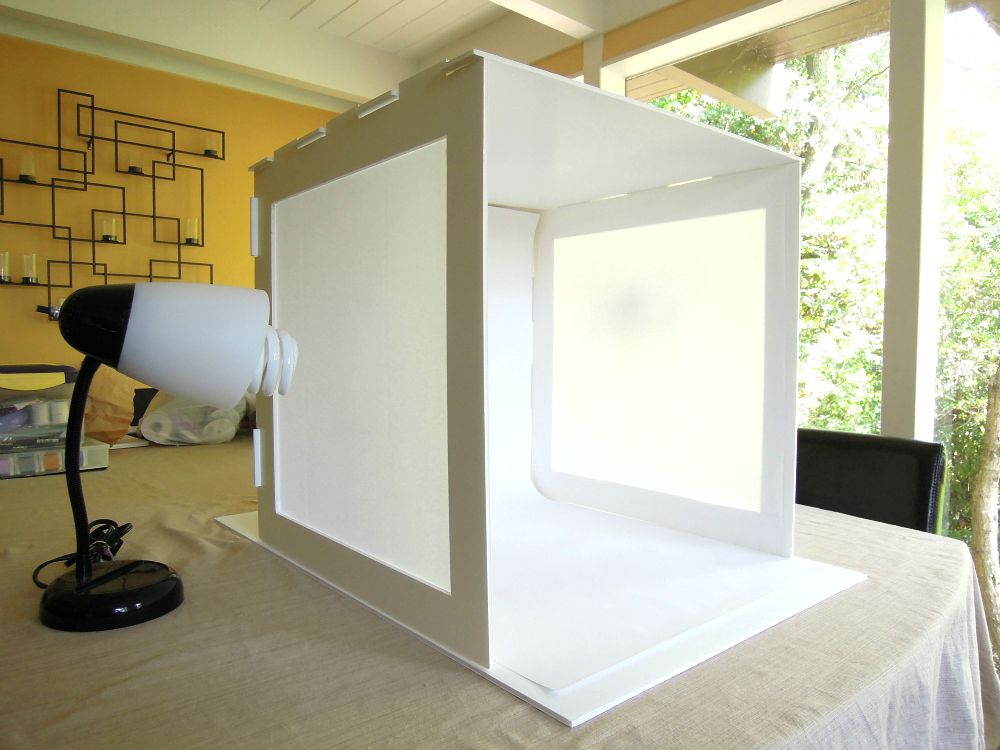
I didn’t want to add another full-on image gallery to my WP installation — I just needed something simple that worked with the already existing image galley feature in WP. This plugin did the trick nicely. Simple and useful!
Simply presenting the pictures. Works on all installed WP-Galleries without any additional effort or configuration.
WordPress was updated, and with that, the plugin is not working correctly, giving conflicts, not working correctly. You click on the images and it doesn’t open the gallery like it should.
Посмотреть 91 отзыв
«Gallery Lightbox» — проект с открытым исходным кодом. В развитие плагина внесли свой вклад следующие участники:
Участники
- GhozyLab
«Gallery Lightbox» переведён на 4 языка. Благодарим переводчиков за их работу.
Перевести «Gallery Lightbox» на ваш язык.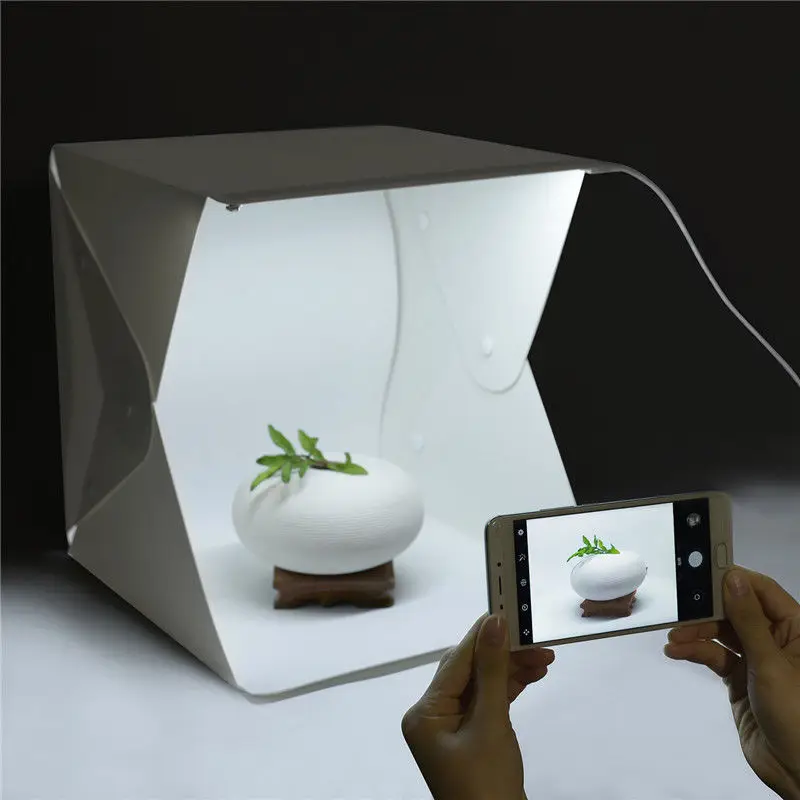
Заинтересованы в разработке?
Посмотрите код, проверьте SVN репозиторий, или подпишитесь на журнал разработки по RSS.
1.0.0.39
- Fixed : Compatibility issue with new Gallery Block
- Update : WordPress 5.9 compatibility
1.0.0.37
- Fixed : Javascript issue in frontend
- Update : WordPress 5.5 compatibility
1.0.0.35
- Tweak : Replace selectbox (dropdown mode) with button animation in gallery settings page
- Fixed : Wrong plugin name in PHP variable
- Fixed : Many other PHP and CSS clean and optimization
1.0.0.33
- Fixed : RTL language issue
- Fixed : jQuery selector for several markup, thanks to @ov3rfly
- Fixed : Many other PHP and CSS clean and optimization
1.0.0.31
- Tweak : Compatibility with the latest Image Carousel plugin
1.0.0.30
- Tweak : Gutenberg Gallery Block compatibility
1.
 0.0.29
- New : Malaysia Language ( ms_MY )
- Timestamp : none
- Update : WordPress 4.8 compatibility
1.0.0.27
- Update : POT file and all Languages
- Timestamp : 03/13/16 00:01:17
1.0.0.25
- Added : New Option to Enable / Disable Lightbox Fancy Caption
- Timestamp : 02/06/16 17:14:18
1.0.0.23
- Tweak : Free Plugins Page styles
- Timestamp : 02/01/16 08:58:12
1.0.0.21
- Tweak : Retrieving Premium and Free plugin page via AJAX to speed page load
- Timestamp : 01/29/16 08:16:55
1.0.0.19
- Tweak : Update Lightbox selector to make it compatible with custom link feature from Image Carousel Plugin ( version 1.0.0.15 ) that will released within a few days
- Timestamp : 01/28/16 14:24:02
1.0.0.17
- Added : New Option to show/hide thumbnails caption
- Timestamp : 01/24/16 07:29:30
1.
 0.0.15
- Tweak : Settings Link in plugin list
- Timestamp : 01/17/16 15:06:04
1.0.0.11
- Tweak : Move admin notice from Documentation Tab to Settings Tab
- Timestamp : 01/08/16 16:23:05
1.0.0.10
- Tweak : Documentation Page
- Timestamp : 01/06/16 15:10:40
1.0.0.9
- Fixed : Thickbox ( add_thickbox ) issue on Free Install Plugins Page
- Timestamp : 12/17/15 13:19:48
1.0.0.7
- New : Language ( he_IL )
- Fixed : Slider interval from 1 seconds to 3 seconds when interval not set
- Timestamp : 11/25/15 01:50:20
1.0.0.5
- New : Language ( sv_SE )
- Timestamp : 11/06/15 10:37:57
1.0.0.3
- Tweak : Change text domain to plugin slug
- Timestamp : 10/01/15 12:10:50
1.0.0.1
- Fixed : Many other PHP and CSS clean and optimization
- Timestamp : 09/04/15 23:15:44
1.
 0.0.0
0.0.0- This is the launch version. No changes yet.
- Timestamp : 08/19/15 12:07:22
Мета
- Версия: 1.0.0.39
- Обновление: 3 месяца назад
- Активных установок: 10 000+
- Версия WordPress: 3.3 или выше
- Совместим вплоть до: 6.0.3
- Языки:
Chinese (Taiwan), Czech, English (US), German и Russian.
Перевести на ваш язык
- Метки:
gallerygallery lightboximage sliderslider
- Дополнительно
Оценки
Посмотреть все
- 5 звёзд 80
- 4 звезды 6
- 3 звезды 2
- 2 звезды 0
- 1 звезда 3
Войдите, чтобы оставить отзыв.
Участники
- GhozyLab
Поддержка
Решено проблем за последние 2 месяца:
1 из 1
Перейти в форум поддержки
Пожертвование
Would you like to support the advancement of this plugin?
Пожертвовать на развитие плагина
Как сделать недорогую легкую палатку
Следующее руководство по сборке недорогой легкой палатки было прислано Джеффри Бейлом. См. учетную запись Flickr Джеффри здесь.
Примечание : Хотя это отличный учебник «Сделай сам», который использовали тысячи наших читателей, у Amazon есть много недорогих легких палаток, которые дадут вам отличные результаты.
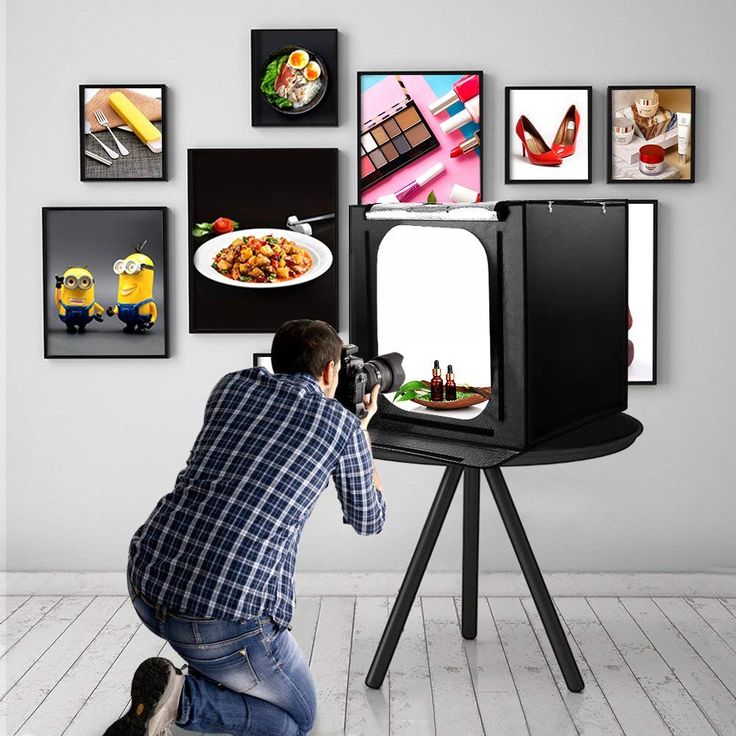
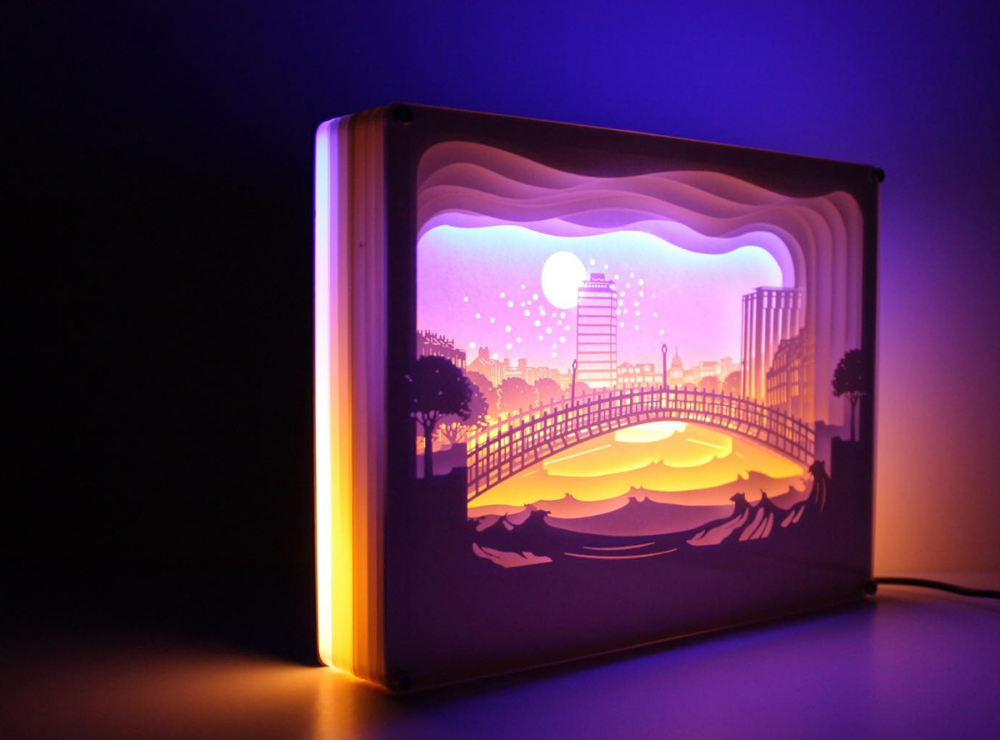
Как сделать отличный лайтбокс своими руками?
Все в этой статье!
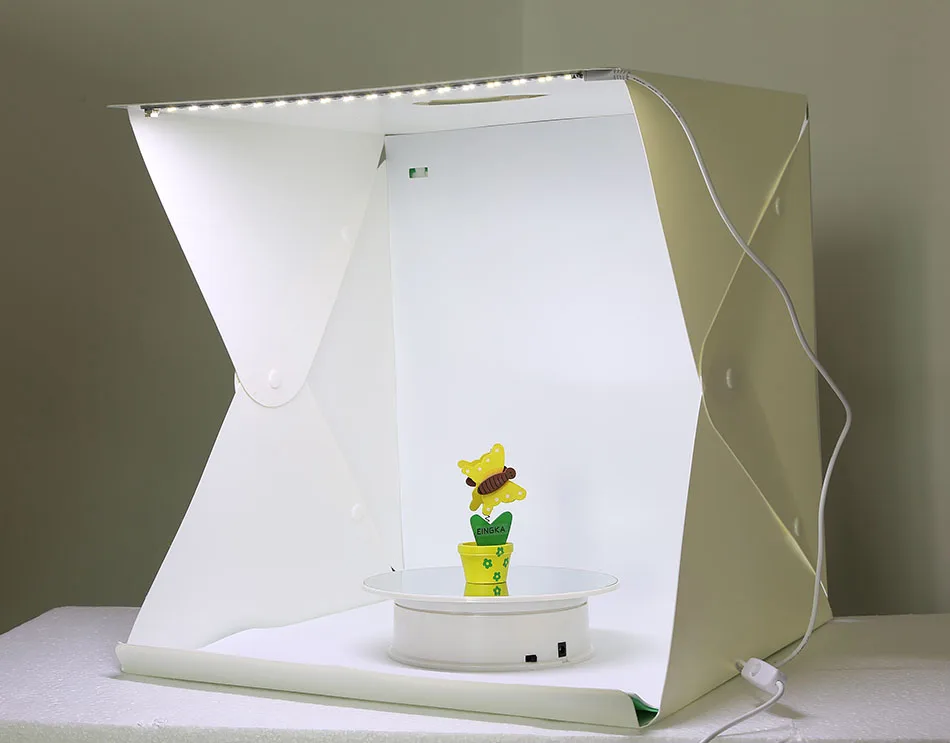
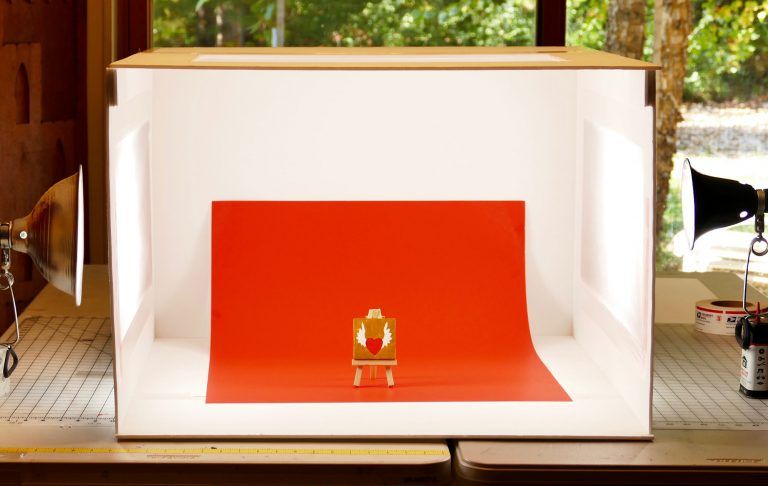
Видите ли, если вы похожи на меня, вы не хотите тратить деньги, если вы можете сделать это самостоятельно и получить те же результаты.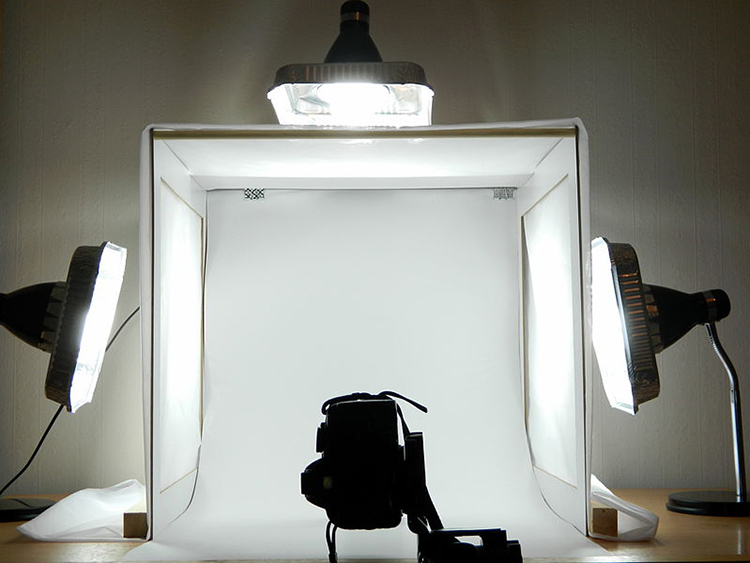 Однажды я был в местном фотомагазине и увидел одну из этих световых палаток «Pop-Up». Он состоял из складной белой тканевой коробки с отверстием спереди и 3 фонарей, которые использовались для фотографирования небольших объектов в фотостудиях (например, снимок шоколадного оленя слева).
Я собирался купить его, пока не увидел ценник в 100 долларов. Ни в коем случае я не собираюсь тратить 100 долларов на ткань и 3 лампы, когда материал стоит намного дешевле. Итак, я отправился и построил одну из этих легких палаток, и получилось совсем неплохо.
Необходимые материалы:
1.) Коробка – Она может быть любого размера, если вы можете ее зажечь! Я предпочитаю, чтобы он был настолько квадратным, насколько это возможно. Вы можете найти коробки в любом месте бесплатно. Я свой получил с работы, на которой все равно выбрасывают. Вы также можете найти коробки в задней части торговых центров, продуктовых магазинов, магазинов бытовой техники или практически в любом месте, где производятся или продаются товары.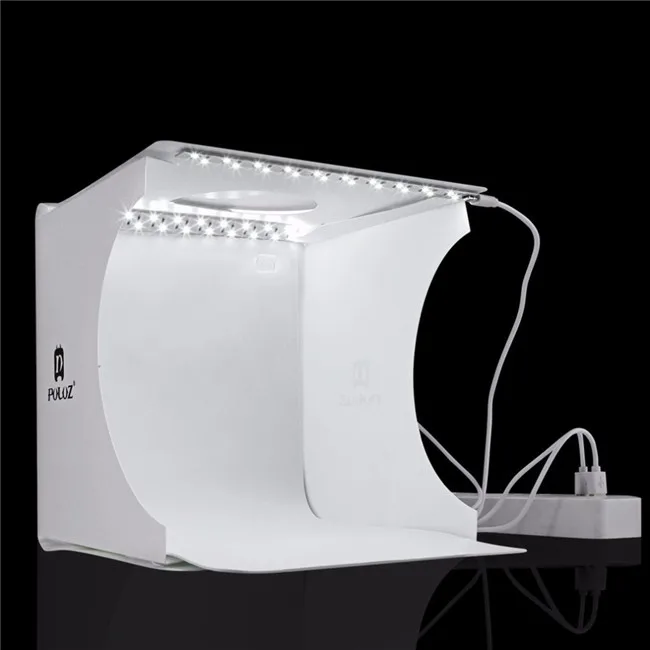 Толще, тем лучше! (Свободно)
2.) Ткань ‘ Это снова может быть любой тип. В своей коробке я использовал белую муслиновую ткань, которую можно найти в местном магазине декоративно-прикладного искусства. Купите столько, чтобы покрыть всю коробку. (4 доллара США или 1,9 доллара США).9 ярдов) Люди предложили другие ткани, такие как белый нейлон и белый флис. Если вы очень дешевы и у вас есть белые нижние рубашки. Разрежьте стороны, где у вас есть две половинки рубашки. Если вы используете несколько футболок, убедитесь, что цвета совпадают, иначе конечный результат может получиться не таким, как вам нравится.
3.) Лента ‘ Я использую ленту, чтобы прикрепить ткань к бокам коробки. Причина в том, что на случай, если вы захотите попробовать разные ткани. Я использую обычный малярный скотч. (1 доллар США за рулон)
4.) Клей ‘ Вы можете использовать «Клей-карандаш» (1 доллар США за стержень) или аэрозольный клей (5 долларов США за банку), чтобы приклеить подкладку к коробке.
5.) Белая доска Bristol ‘ Она выровняет внутреннюю часть коробки, а также послужит вам спиной (0,50 листа X2). Я бы посоветовал купить 2 или 3 листа, так как вы будете резать два, чтобы выровнять коробку (может быть больше, в зависимости от размера вашей коробки), и один для задней части. Бристольский картон — это плотная бумага (толщиной 0,006 дюйма), которая используется в рисовании и искусстве. Название произошло от того места, где оно было создано, Бристоль, Англия. Если вам нужна другая спинка, вы также можете выбрать другие цвета.
6.) Освещение ‘ Вам нужно будет осветить этот ящик, и это может быть самой дорогой частью ящика, если у вас еще нет света. На мой взгляд, освещение — самая важная часть этой коробки. Без него вы не получите желаемого изображения. Я пошел в местный хозяйственный магазин и купил несколько лампочек дневного света. Использование обычных лампочек будет давать желтый свет, и его следует избегать. Я купил компактные люминесцентные лампы «n:vision» мощностью 90 Вт (7 долларов США).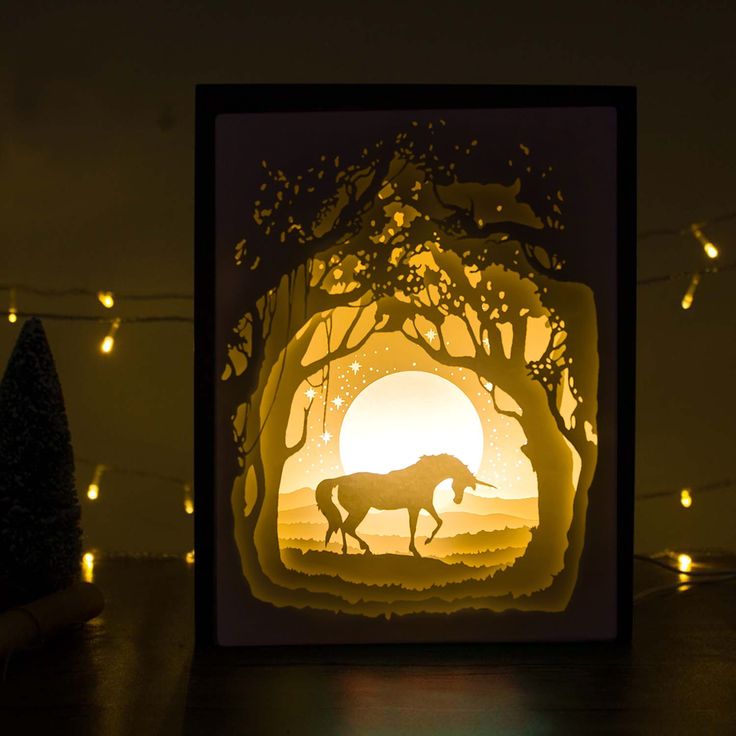 В принципе подойдут любые лампочки Full Spectrum.
Также посоветуйте светильник. Если у вас есть одна из этих настольных рабочих ламп, она будет работать нормально. Если вы этого не сделаете, я предлагаю приобрести «Clamp On Work Light». В моем местном домашнем складе у них было только два вида: отражатель меньшего размера (5 дюймов) за 5,99 долларов (США) или 10,5-дюймовый отражатель за 11,99 долларов (США).
7.) Разные инструменты ‘ Ленточная линейка, линейка или линейка, ножницы и нож
Теперь, когда у вас есть материалы, я покажу вам, как шаг за шагом сделать легкую палатку. Когда вы закончите, вы можете сделать хорошие четкие и четкие снимки продукта.
Пошаговый процесс:
A) Возьмите коробку с рулеткой и маркером и отмерьте 2″ от стороны коробки, отметив маркером несколько точек. Когда вы закончите, вы увидите свою границу, соедините точки, используя линейку, где у вас должен быть красивый квадрат / прямоугольник в середине коробки с 2-дюймовой рамкой вокруг него. Оставьте верх и низ коробки в покое, так как вам не нужно будет их маркировать.
B) Вырежьте нарисованные коробки . Повторите это для сторон коробки, где вы нарисовали коробки. Когда вы закончите, отрежьте верхнюю часть коробки или удалите клапаны в верхней части коробки. ОСТАВЬТЕ НИЖНЮЮ ЧАСТЬ!
C) Теперь возьмите доску Bristol и проведите маркером линии через каждые два дюйма 16 раз. Затем ножницами вырежьте 16 полосок.
D) Вклейте бумажные полоски в коробку. Убедитесь, что сторона с маркером прилегает к картону, чтобы его не было видно.
E) Возьмите еще один кусок бристольского картона и обрежьте так, чтобы ширина была такой же, как внутри коробки, а длина была намного больше, чем коробка.
F) Поместите длинный кусок бристольского картона в коробку так, чтобы он загибался вниз. Избегайте складок, так как они будут видны на вашей фотографии.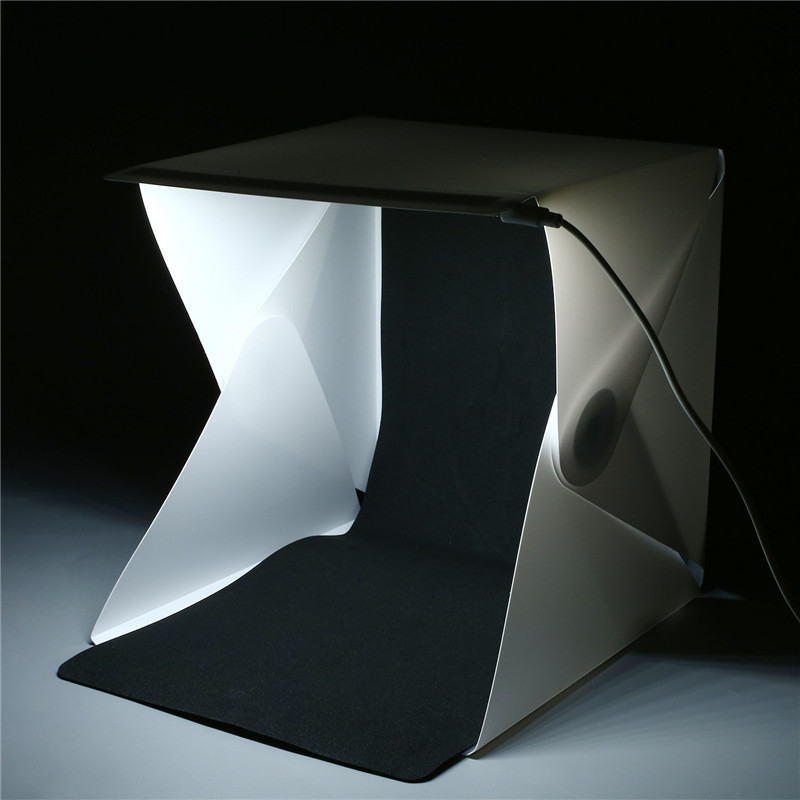 Отрежьте лишнюю бумагу, которая торчит сверху.
G) Разрежьте ткань так, чтобы она закрывала отверстия . Затем отрежьте большой кусок так, чтобы он закрывал верхнюю часть коробки.
H) Заклейте тканью отверстия в коробке, за исключением того, которое обращено к вашему фону. Затем приклейте верхнюю часть.
ГОТОВО!
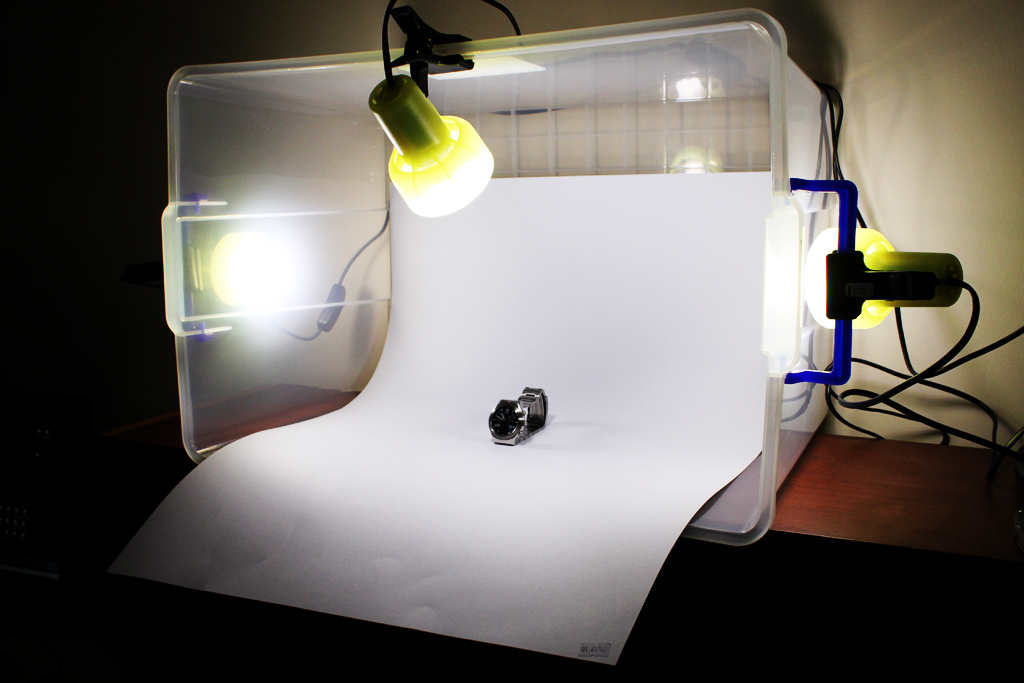
Теперь все, что вам нужно сделать, это зажечь верхнюю часть коробки и начать щелкать!
Есть много вариантов, которые вы можете сделать, чтобы получить желаемую фотографию. Если у вас возникли проблемы с тенями, я предлагаю осветить другие стороны коробки. Если вы получаете виньетирование, я предлагаю надеть бленду или сдвинуть объектив дальше в коробку. Photoshop также может быть удобным инструментом! Так как мой объектив и камера не самые чистые, я стараюсь фотошопить пыль, которая сидит на моей камере или внутри нее. Я также настраиваю уровни, чтобы было ярче.
Камера торчит в коробке
Световой короб в действии
Другой результат вышеуказанного светового короба
Вот оно!
Как вы уже должны знать, создать красивую световую коробку чертовски просто.
Итак, сделайте свой лайтбокс. И протестируйте его на некоторых забавных продуктах.
(И поделитесь своими результатами в комментариях!)
Понравился этот урок? Получайте больше каждую неделю с нашей бесплатной рассылкой по электронной почте.
Также ознакомьтесь с другими нашими мастер-классами по работе со вспышками и освещением для цифровых фотографов.
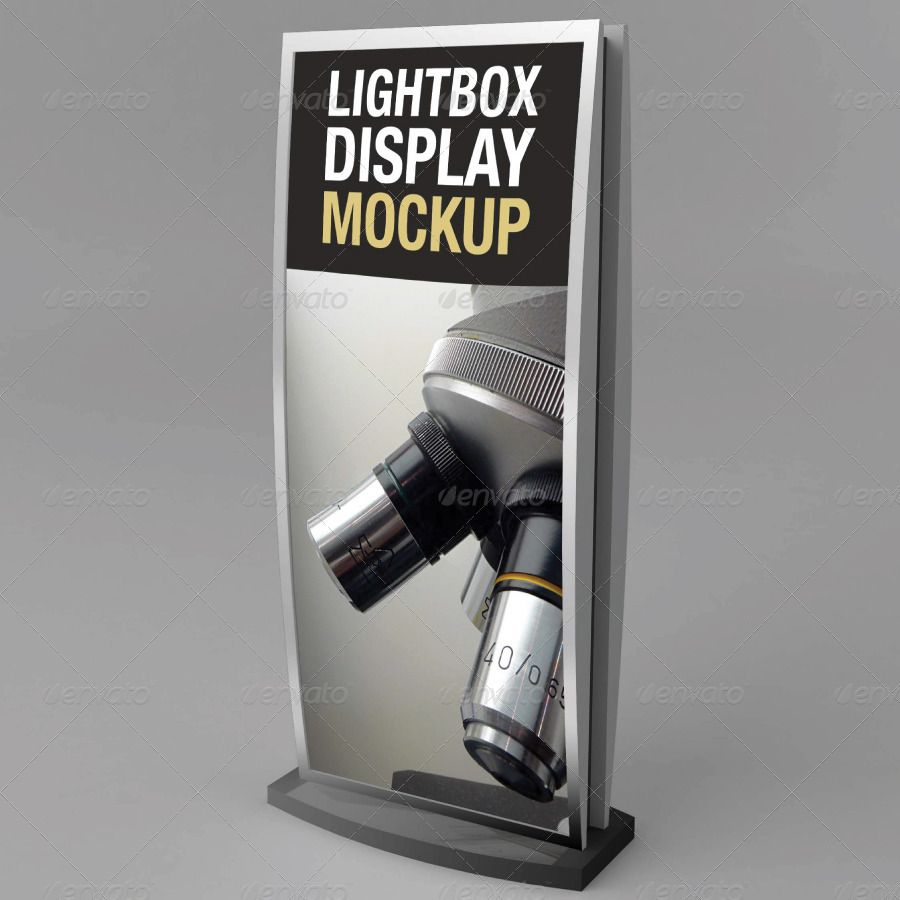
Светодиодные короба и световые панели производства Prime Light Boxes
Фейсбук Линкедин Инстаграм YouTube
ЗАЖИГАЙ!
Светодиодные тканевые световые короба
Светодиодные рамки
Светодиодные панели
Короткие сроки изготовления и разумные цены
СДЕЛАНО В КАНАДЕ
узнать сейчас
Предыдущий
Следующий
ТКАНЬ
СВЕТОВЫЕ КОРОБКИ
ЗАЖИМ ДЛЯ СВЕТОДИОДОВ
РАМКИ
СВЕТОДИОД АКРИЛОВЫЙ
СВЕТИЛЬНЫЕ ПАНЕЛИ
СВЕТОДИОДНАЯ ПОДСВЕТКА
СВЕТОВЫЕ ПАНЕЛИ
БЕЗ ПОДСВЕТКИ
РАМЫ
ПРИМЕНЕНИЕ
СУЩЕСТВУЮТ РАЗЛИЧНЫЕ ОБЛАСТИ ПРИМЕНЕНИЯ СВЕТОДИОДНЫХ КАМЕР
Мы здесь, чтобы помочь вам выбрать лучшее применение лайтбокса для вашего помещения
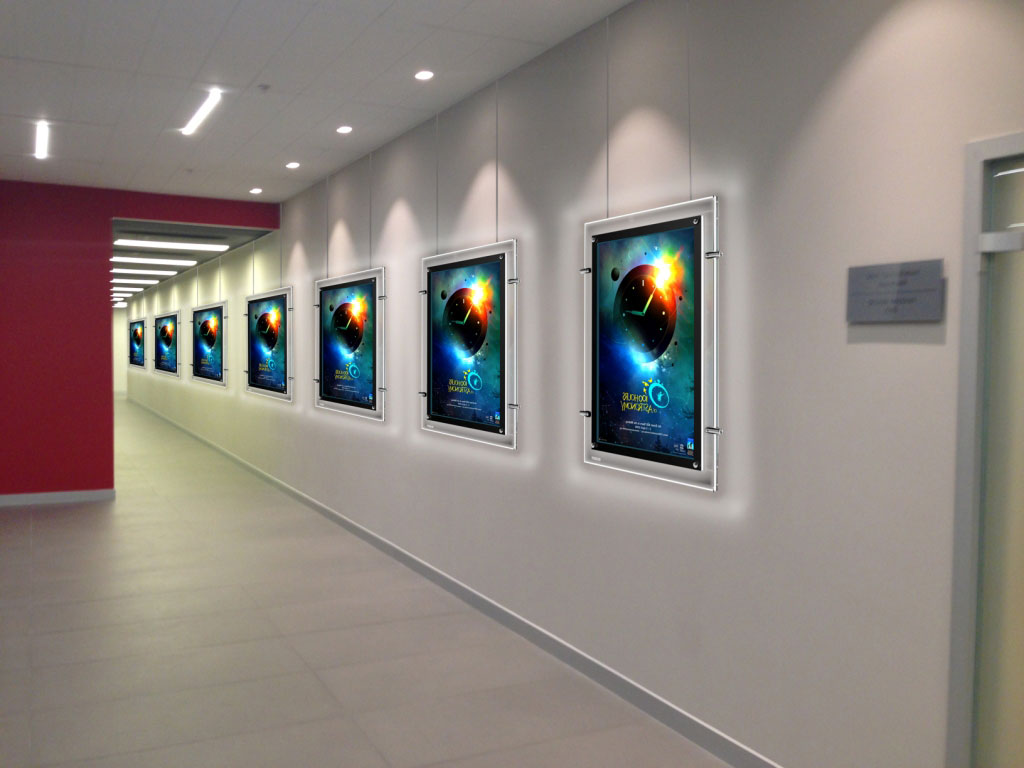
Лайтбоксы для постеров к фильмам — элегантное дополнение к любому кинотеатру …
Есть так много применений фальшивых окон или фальшивых окон…
Использование светодиодной панели с задней подсветкой в винной полке создает удивительный образ, который …
Все продукты, которые вы покупаете у нас, одобрены CSA/UL и поставляются с …
Большие и привлекательные светодиодные лайтбоксы так широко распространены в торговых центрах и…
«Как сделать свой офис особенным и создать здоровую рабочую атмосферу?» …
Reza Babayi ★ ★ ★ ★ ★
Read
. Особенно во время этой пандемии эти Faux Windows дают мне надежду и приносят спокойствие. …
Sean Huynh ★ ★ ★ ★ ★
★
октябрь, 2021★
. Амазонка … Mohammad Tafti ★ ★ ★ ★ ★
Read Diret
9000 9000 9000 9000 9000 9000 9000 9000 9000 9000 9000 9000 9000 9000 9000 9000 9000 9000 9000 9000 9000 9000 9000 9000 9000 9000 9000 9000 9000 9000 9000 9000 9000 9000 9000 9000 9000 9000 9000 9000 9000 9000 9000 9000 9000 9000 9000 9000 9000 9000 9000 9000 9000 9000 9000 9000 9000 9000 9000 9000 9000 9000 9000 9000 9000 9000 9000 9000 9000 9000 9000 9000 9000 9000 9000 9000 9000 9000 9000 Мы очень довольны продуктами, которые мы …Предыдущий
Следующий
5/5
В заключение, все наши продукты для продажи в США и Канаде сертифицированы CSA и UL.